Before you send an article to WordPress or export it manually, take a few minutes to review the draft.
This helps you catch missing details, avoid publishing surprises, and make the article easier for readers to use.
Start with the article itself
Review the visible article first:
- Make sure the title matches the topic.
- Read the introduction and check that it sets the right expectation.
- Skim each heading to make sure the article is easy to follow.
- Remove repeated or awkward sentences.
- Check that the conclusion feels useful, not abrupt.
Read the article like a busy Pinterest reader. If a section does not help them understand the idea faster, shorten it or rewrite it.
Check images
Open the Image tab in the Publish panel and review each image.
Make sure:
- The best image is marked as the featured image.
- Each image has useful alt text.
- Captions are correct if you plan to show them in WordPress.
- Regenerated or uploaded images still fit the article section.
Check SEO fields
Open the SEO tab and review:
- SEO title
- Meta description
- Slug
These fields help keep the WordPress version organized and easier to review before publishing.
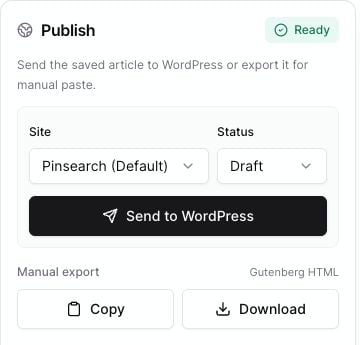
Check WordPress publishing settings
In the Publish panel:
- Choose the Site you want to send the article to.
- Choose the Status.
- Review the readiness badge.
- Fix any warnings before sending.
Choose Draft if you want to review the post inside WordPress first. Choose Publish only when you are ready for the post to go live.
Decide how to publish
You have two publishing paths:
- Use Send to WordPress when your WordPress site is connected and you want Pinsearch to create or update the post.
- Use Copy or Download under Manual export when you want to paste the article into WordPress yourself.
Final pre-publish checklist
- Article title is final.
- Body text has been reviewed.
- Featured image is selected.
- Image alt text is filled in.
- SEO title, meta description, and slug are ready.
- WordPress site and status are correct.
- You clicked Save after your latest edits.